REVIEW · STAVANGER
Stavanger: Guided Winter Hike Pulpit Rock Preikestolen
Book on GetYourGuide →Operated by Lysefjorden Adventure AS · Bookable on GetYourGuide
A winter climb with fjord views. I especially love the small group format and how the English guide brings the region to life as you walk. I also like that you can get crampons when needed, which matters a lot on icy rock.
The main thing to be ready for is the winter footing: even an easy-moderate route can feel slippery in the steeper parts, so proper boots and smart pace are not optional.
In This Review
- Why This Winter Preikestolen Day Feels Worth Your Time
- Meeting at 7:15 AM and Crossing the Fjord by Ferry
- Preikestolen Lodge Gear Check: Boots, Crampons, and Maybe a Headlamp
- The Climb to Pulpit Rock: Distance, Elevation, and Winter Reality
- On the Trail: What the Guide Adds in Winter
- First Big Views: When Pulpit Rock Opens Up
- Lunch, Water, and Snacks: Plan Like the Weather Matters
- Heading Back Down: Timing, Slippery Spots, and Staying Calm
- Is $145 Good Value for This Preikestolen Winter Day?
- What to Pack for a Cold, Slippery Fjord Morning
- Who This Tour Fits Best (and Who Should Rethink It)
- Should You Book This Winter Hike to Pulpit Rock?
- FAQ
- How long is the Stavanger guided winter hike to Pulpit Rock?
- What is the distance and difficulty of the hike?
- How long does the uphill and downhill take?
- Does the tour include transportation from Stavanger?
- Will I have a guide, and do they speak English?
- Are crampons provided for icy conditions?
- Are hiking boots required, and can I rent them?
- Are meals included?
- What is the cancellation window?
Why This Winter Preikestolen Day Feels Worth Your Time
- Pickup from Stavanger city center keeps the morning from turning into a transport puzzle.
- Ferry crossing + short drive breaks up the day and gives you fjord views before the climb even starts.
- Preikestolen Lodge as the staging point means you begin in the right place, with time to get set.
- Crampons provided if conditions require so you can focus on footing, not guesswork.
- A top stop with time to linger lets you enjoy the view and take photos, not just rush through.
- Small group capped at 8 gives you room to ask questions and move at a winter-friendly pace.
Meeting at 7:15 AM and Crossing the Fjord by Ferry
This is a full-day outing that starts early, with pickup from your hotel in Stavanger city center at 7:15 AM. The idea is simple: you’re not wrestling with buses or rental cars on a winter morning. The group heads toward the Stavanger or Lauvvik ferry station, then crosses the fjord by ferry.
I like that this ferry segment does more than move you. It gets you out into the rhythm of Norway in winter: colder air, wider water, and the sense that you’re traveling between worlds. You also arrive at the hiking start feeling warmed up and mentally set, rather than stressed.
After the ferry, there’s a short drive to Preikestolen Lodge, where the hike begins. That staging matters because winter hikes often succeed or fail based on how smoothly you get geared up and oriented.
You can also read our reviews of more guided tours in Stavanger

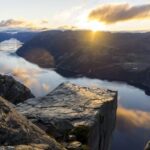
Preikestolen Lodge Gear Check: Boots, Crampons, and Maybe a Headlamp
Before you start walking, you’ll typically get a winter-ready setup for the trail. The route can turn slippery depending on snow and ice, and that’s exactly why the supplier can provide crampons if conditions require it. The point isn’t drama; it’s practical safety.
Also plan for boots. Hiking boots are required, and the tour offers boot rental when you book. That’s a big deal for visitors who arrive with the wrong footwear and want to avoid awkward last-minute shopping. If you’re bringing your own boots, make sure they’re winter-appropriate and actually good on rock.
One winter detail I appreciate from the experience description: at the base camp stage, you may be given traction gear plus a headlamp if you don’t already have one. Early winter mornings can mean dim light, and it helps to walk confidently even before the sun fully shows up.
The Climb to Pulpit Rock: Distance, Elevation, and Winter Reality
The hiking part is straightforward on paper and more serious on the ground, which is why guided winter hikes are so popular. The hike covers about 4 km each way, and the route is described as easy to moderate. You should also expect 2 to 3 hours uphill and 2 to 3 hours downhill, depending on conditions.
The uphill effort is real. A common reference point for this trail is around 334 m of ascent, spread over the walking distance. In winter, that ascent feels different because traction affects everything: your speed, your confidence, and even how you place your feet on uneven surfaces.
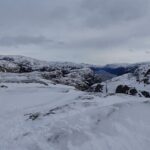
Here’s what I’d watch for if you’re not a frequent winter hiker. Even when the overall route is manageable, there can be sections that feel steep and exposed. When the trail turns slick, you’ll want to shorten your stride, slow down, and let the crampons do their job. This is where the guide helps most, not by pushing you, but by keeping you moving safely.
You don’t need to be a mountain athlete, but you should have some comfort walking for long stretches outdoors in cold weather. The tour description says some hiking experience is desirable, not mandatory. In practice, your biggest limiter will be icy footing, not fitness.
On the Trail: What the Guide Adds in Winter
Winter hikes can be visually stunning and a bit monotonous if you’re just staring at the snow. A good guide changes that. This one runs with an English live guide, and the experience emphasizes interpretation: what you’re seeing, where it comes from, and how the region works.
One guide name that comes up is Hege, and the vibe matters. The style described is patient and question-friendly, which is exactly what you want when footing and cold can make people tense. If you like learning what you’re walking through, a guided format is a real upgrade over a DIY hike.
Also, the trail experience in winter can be slower. That’s not a flaw. It’s the honest trade: you’ll spend more time using careful steps, and the guide’s role becomes about pacing, safety, and helping you notice the details that get missed when you rush.
First Big Views: When Pulpit Rock Opens Up
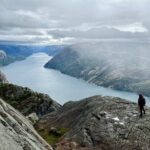
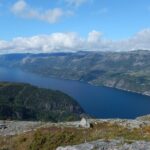
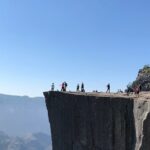
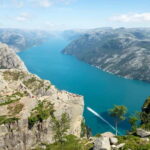
Eventually, you reach Pulpit Rock (Preikestolen), the moment most people came for. The top view is the main event: Norwegian mountains, winter wonderland scenery, and fjords spread out in front of you.
This is not a quick stop. You’re given time to enjoy the views and take photos, and to actually be still for a minute. In winter, that stillness is part of the value. The daylight can feel softer, and the colder air can make the scenery look crisp.
One seasonal note you’ll appreciate if you’re planning your timing: in summer, the platform can get crowded, and it’s hard to get a clear photo without other people in the frame. Winter tends to feel calmer, which means you can enjoy the moment more fully and take pictures with less hassle.
You can also read our reviews of more hiking tours in Stavanger



Lunch, Water, and Snacks: Plan Like the Weather Matters
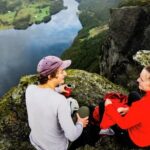
This is one spot where you should plan carefully. The hiking description talks about enjoying lunch and beverages at the top, but the activity details also list meals and drinks as not included. So I’d treat this as a bring-your-own situation.
At minimum, bring snacks and something to drink. The tour encourages bringing water in a container you can refill on the trail, and it points out that mountain water sources in Norway are typically clean and tasty. If you already have a refillable bottle or thermos, you’re set.
Think about the reality of winter: you’ll feel thirst differently than in summer, but you still need fluids. Cold air and wind can also dry you out fast, especially if you’re bundled up. A small snack also helps you keep energy steady during both the uphill and the return.
And yes, you’ll carry your own gear. A suitable backpack is recommended, so you have a place for layers, water, and snacks. Winter walking is easier when your essentials are accessible, not buried.
Heading Back Down: Timing, Slippery Spots, and Staying Calm
The return hike typically takes another 2 to 3 hours, again depending on weather and trail conditions. The distance is the same overall (about 4 km back), but descending in winter changes the whole feel of the walk.
Downhill means gravity helps you move, which can tempt you to speed up. In icy conditions, that’s when slips happen. This is exactly where traction gear and careful pacing matter, and why the tour’s crampon approach is so important.
A good strategy is to treat the descent like controlled walking rather than catching up time. Keep an even pace, give yourself space from others, and watch for the more demanding spots the trail description warns about. If you feel cold, adjust layers before you get miserable. People often wait too long in winter and then lose their rhythm.
The day typically ends with you back in Stavanger around 3:00 to 4:00 PM, after the full tour time of about 9 hours. That means you’re getting a satisfying chunk of walking and views without losing your entire afternoon to travel.
Is $145 Good Value for This Preikestolen Winter Day?
At $145 per person for a 9-hour guided winter hike, the value is best understood by what’s included versus what you’d pay or arrange yourself.
You’re paying for:
- A live English guide through the whole experience
- Transportation, including the pickup from your hotel and the ferry crossing
- Small-group attention with a limit of 8 participants
- Winter traction support when conditions require it (crampons)
If you tried to DIY this, the cost you’d likely recreate is not only fuel or transport, but also guide-level knowledge for winter conditions, plus the hassle of getting from Stavanger to the trailhead smoothly. The small group also isn’t a luxury detail. On slippery trails, fewer people means less congestion and easier spacing.
Could you hike this route alone? Possibly, but winter adds variables you don’t want to guess on: ice levels, safe pacing, and gear choices. For many visitors, a guided day is the smartest way to buy confidence and keep the focus on the views.
What to Pack for a Cold, Slippery Fjord Morning
The tour description is clear: you should wear clothes and shoes for cold weather, and dress for wind and wet. That means warm, windproof, and waterproof layers are your base. Winter on the fjord can be windy, and the top can feel colder than you expect.
Here’s what I’d prioritize:
- Hiking boots (required), or rent through the booking if you need to
- Warm, windproof, waterproof outer layer
- Extra warm layer for breaks at the top
- Backpack for water and snacks
- A refillable water container
- Snacks for the day since meals and drinks are listed as not included
If you already have a headlamp, bring it. If not, it may be provided at the base camp stage, but don’t count on that as your plan.
Also, keep your photo gear realistic. In cold weather, batteries lose power faster. If you’re using a phone or camera, keep backups warm under a layer until you’re ready to shoot.
Who This Tour Fits Best (and Who Should Rethink It)
This tour suits you if you want:
- A guided winter walk with help on traction and pacing
- Fjord-to-mountains views without figuring out logistics
- A manageable winter hike that still delivers a huge payoff at the top
- A small group where you can ask questions during the walk
It’s also a strong match if you’re traveling with limited daylight and want one structured day that returns to Stavanger by late afternoon.
Rethink it if you’re:
- Unprepared for slippery winter conditions and don’t want to use the provided crampons
- Expecting a fully guided experience with provided meals and drinks (the tour details list meals and drinks as not included)
- Looking for an extremely casual stroll with minimal effort
The upside is that the hike is described as easy to moderate, and you’ll have time at the top to actually enjoy the view, not just reach it and sprint onward.
Should You Book This Winter Hike to Pulpit Rock?
I’d book this if you want the famous Preikestolen viewpoint but prefer to do it with transport sorted, gear support available, and an English guide who keeps the experience moving and meaningful. The best part is the combination: ferry ride, winter traction reality, and a long enough top stop to enjoy the scenery.
You might skip it if you dislike winter hiking conditions and you don’t feel ready for icy patches or cold-stamina walking. And if you’re counting on included meals, plan to bring your own snacks and drinks to match the stated meal policy.
If you’re deciding right now, my advice is simple: come dressed for wind and wet, pack a refillable bottle, and treat the hike as a careful winter walk to a spectacular viewpoint. That’s where the value lands.
FAQ
How long is the Stavanger guided winter hike to Pulpit Rock?
The total duration is 9 hours.
What is the distance and difficulty of the hike?
The hike is about 4 km each way (around 8 km round trip) and is rated easy to moderate, with some sections that can be more demanding in snow and ice.
How long does the uphill and downhill take?
The hike up takes about 2 to 3 hours, and the hike back down also takes about 2 to 3 hours.
Does the tour include transportation from Stavanger?
Yes. Pickup is included from Stavanger city center, and you’ll travel via ferry and then a short drive to the trail starting point.
Will I have a guide, and do they speak English?
Yes, you’ll have a live tour guide who speaks English.
Are crampons provided for icy conditions?
The supplier provides crampons if the trail conditions require them.
Are hiking boots required, and can I rent them?
Hiking boots are required. You can rent hiking boots when booking.
Are meals included?
Meals and drinks are not included, so you should plan to bring your own snacks and beverages.
What is the cancellation window?
You can cancel up to 24 hours in advance for a full refund.