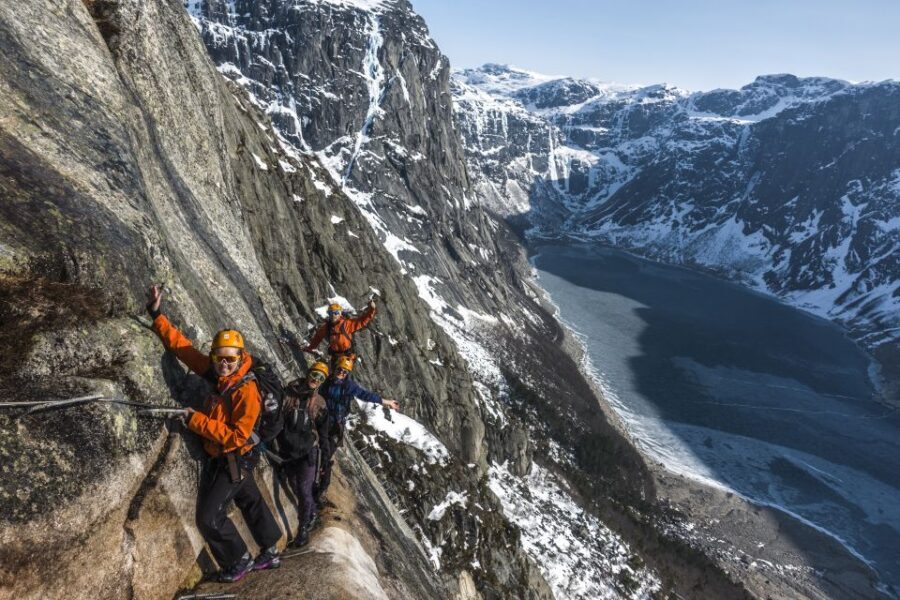
Steel steps on a fjord rock wall sound wild. This Odda Trolltunga via ferrata day packs rugged mountain trails, 250 m of real climbing on steel rungs, and big views over Ringedalsvatnet and the Hardangervidda area, with guides who know how to pace you. I really like that it’s not just about reaching Trolltunga, it’s about how you get there.
I especially love the way the guides turn safety into something you can actually follow. On one climb day, a guide named Emily was described as helpful and fun, and that matches what you should expect here: harnessed the whole way, clear instructions before you start, and techniques explained as you go. I also love the built-in photo payoff, including the famous helmet needle picture moment at Trolltunga.
One consideration: this is a long physical day, and summer weather can turn fast at Hardangervidda. Expect roughly 10–12 hours of hiking and climbing effort, and you’ll want to be comfortable with heights and steady walking on uneven ground.
In This Review
- Key points worth knowing
- Getting set up in Skjeggedal: gear, briefing, and your first taste of the climb
- Ringedalen lake stroll and the steep start: warm-up miles with mountain attitude
- Via ferrata walls up to 250 m: what the Level C rating means in real life
- Sky Ladder (Himmelstigen) option: 50 m of adrenaline without the full commitment
- Summit canyon pause and the lunch stop: views you earn, not just one more photo
- Final 3 km hike to Troll’s Tongue: the goal feels closer, but the effort keeps going
- Photos and timing: how the helmet moment becomes the best souvenir
- Coming back down: main trail descent or via ferrata finish
- Weather, fitness, and packing: the real Norway lesson here is preparation
- Odda value: why $194 feels fair for this much safety and effort
- Should you book this Trolltunga via ferrata and Sky Ladder day?
- FAQ
- Where is the meeting point for the tour?
- How long is the tour and what time does it start?
- Is lunch included?
- Do I need to bring climbing equipment?
- How hard is the via ferrata compared with the normal Trolltunga trail?
- What is the Sky Ladder (Himmelstigen)?
- What should I pack for the day?
- Is the tour suitable for children?
- Is the tour offered in English?
Key points worth knowing
- Via ferrata built for first-timers (Level C): 250 m up with solid steel steps and a safety wire, if you can handle the normal Trolltunga trail you can likely handle this.
- Sky Ladder (Himmelstigen) is optional: a 50 m stretch for extra adrenaline and photo angles, but you don’t have to do it.
- Hardangervidda National Park views beyond the usual stops: the tour works in the mountain plateau feel, not just one viewpoint.
- Guided timing helps with Trolltunga crowds: the plan aims for a calmer approach, and your guide handles the photo moment.
- You’ll return with real descent options: hike back the main way, or descend via ferrata if you want more climbing flavor.
- Dome-tent night sky is part of the concept: the experience highlights a dome tent with a see-through ceiling, so confirm how it fits your specific day.
Getting set up in Skjeggedal: gear, briefing, and your first taste of the climb
Your day starts at the partner’s office in Skjeggedal 20, 5770 Tyssedal (the red and blue building). Plan to arrive ready to move, not just ready to listen. You’ll meet your guide and get equipped with the climbing setup that makes a via ferrata feel doable instead of scary: harnessing and other required gear.
This is also where the tone gets set. The tour runs like a real outdoor operation: you get a proper briefing on how to clip in, where to trust the steel, and what to do if conditions change. If this is your first via ferrata, that matters. In several accounts, guides were praised for keeping the group comfortable and safe. The goal is simple: you should feel you understand the steps before you commit to the rock.
Then you’re off on a warm-up trail that’s short enough to keep you motivated and long enough to get your legs working. If you tend to rush on hikes, this is your moment to practice pacing. Save your effort for the walls.
You can also read our reviews of more tours and experiences in Odda.
Ringedalen lake stroll and the steep start: warm-up miles with mountain attitude
After the briefing, you’ll do about a 4 km walk along Ringedalen lake on a well-maintained gravel road. It’s scenic in the steady, Norwegian way: open views, cool air, and that feeling that the day will be worth the effort. You’re not climbing yet, but your body is already learning what kind of day it is.
Soon comes the first real test: tackling roughly the first 1 km of the traditional steep trail. This section isn’t long, but it’s the kind of steep that reminds you you’re in the mountains, not on a flat “walk to the viewpoint” outing. For me, this is the right kind of starter. It wakes you up without exhausting you.
You’ll then stop for a lunch break before the climb. Since lunch and snacks are not included, treat this like your chance to eat smart. Bring food that won’t turn into a stress problem when it’s windy—something you can chew while standing, not a complicated meal you regret carrying.
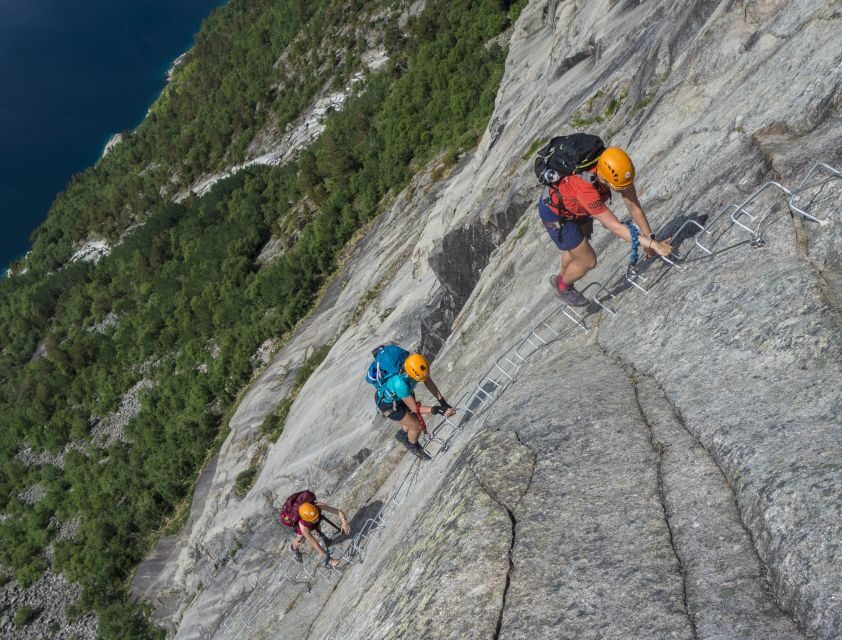
Via ferrata walls up to 250 m: what the Level C rating means in real life
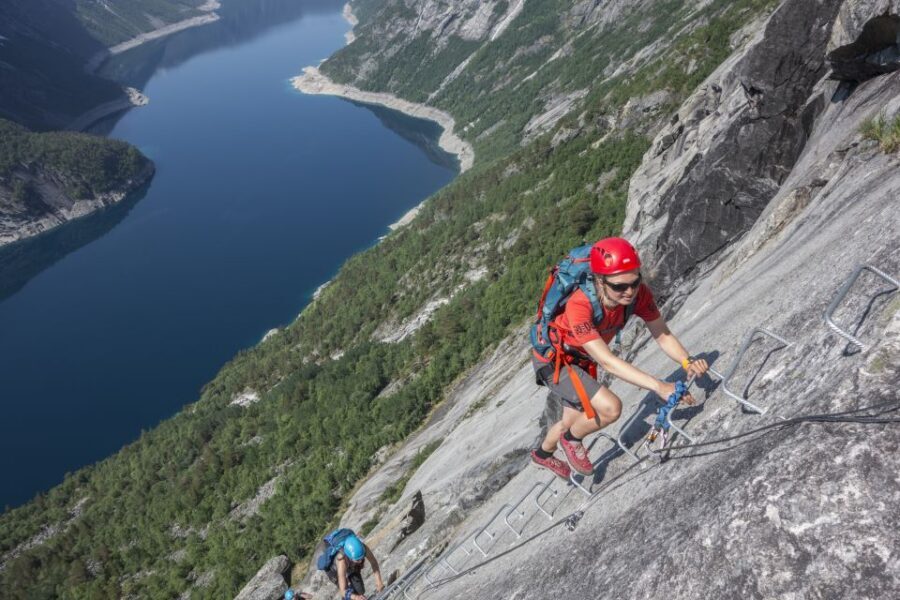
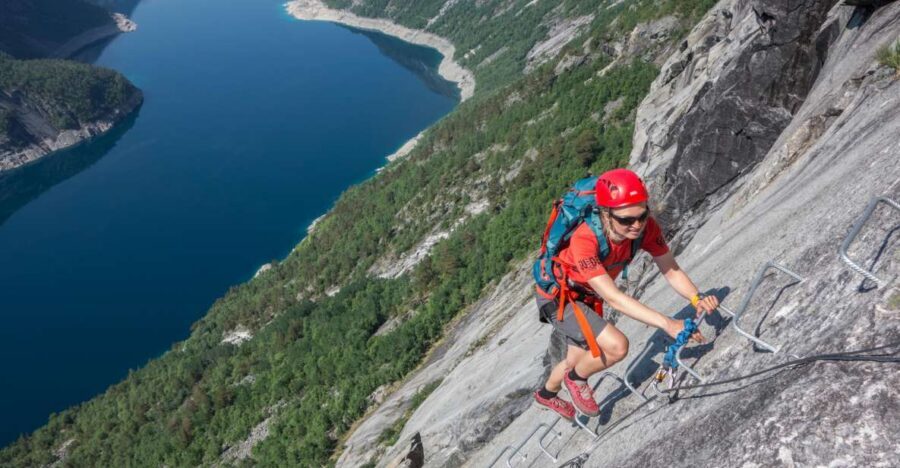
Here’s the core of the day: the via ferrata. You’ll climb across three walls, with the highest wall reaching about 250 m. The tour description is clear that this route is not “technical climbing” in the rock-hands-everywhere sense. Instead, you’ll climb on solid steel steps from start to finish, and you’ll be harnessed to a safety wire the whole time.
The tour frames it as roughly level C. Here’s how I’d translate that for you: you’ll need good balance, steady confidence, and the willingness to move one controlled step at a time. You don’t need to be an experienced climber. If you can manage the normal Trolltunga trail, the via ferrata should be within reach—as long as you don’t panic at heights.
Also pay attention to how the guide teaches your movement. You’ll get climbing tips and tricks during the ascent, including practical ways to keep moving efficiently and safely. If you’re nervous, lean into that. A good guide will make the difference between thinking you’re “trying hard” and feeling like you know what you’re doing.
As you climb, views start stacking quickly. Below you is Ringedalsvatnet, that cold-looking blue water that somehow makes the heights feel even taller. Across the fjord, you might spot Folgefonna Glacier. This is one of the reasons I love via ferrata tours: you get the sensation of altitude in a controlled way, and the scenery arrives as part of the effort.
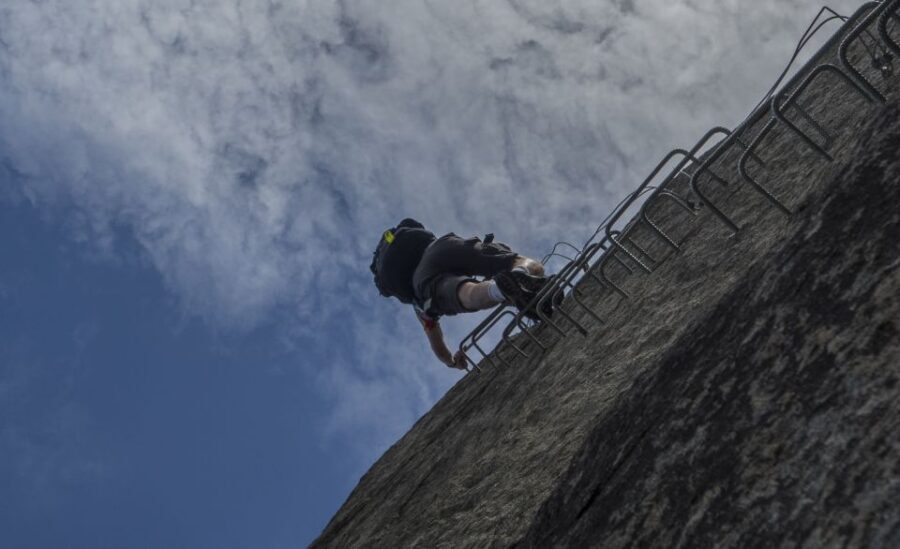
Sky Ladder (Himmelstigen) option: 50 m of adrenaline without the full commitment
Midway through the day, you’ll reach the optional Sky Ladder, called Himmelstigen. It’s about 50 m long, and yes, it’s exactly the kind of section that makes you think, even if you’re enjoying yourself.
The big practical point: it’s optional. If you want the extra challenge and photo angles, you’ll have that chance. If you’d rather keep your energy for the main Trolltunga hike, you can skip it and still get a full day’s worth.
What you shouldn’t do is mentally treat it like a minor add-on. It’s still real exposure on steel. So if heights are your weak spot, choose based on how your breathing feels halfway through the climb. The best decision is the one that keeps you calm for the final hike later.
Summit canyon pause and the lunch stop: views you earn, not just one more photo
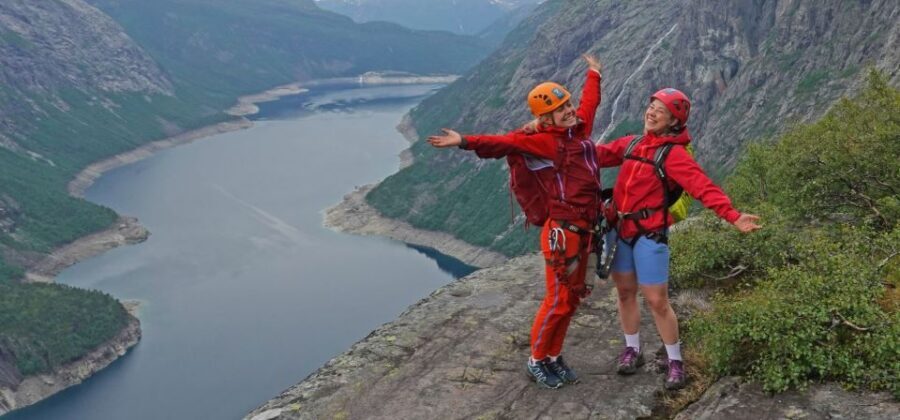
After you’ve climbed roughly 400 m of vertical ascent, you reach the summit area. Here, you’re rewarded with panoramic views of the steep canyon, and you may even see a distant Trolltunga out there like the final goal is pointing at you.
Then you take a break for lunch at this scenic spot. Since you’re carrying your food, this is where packing pays off. Eat enough to keep moving, but don’t overdo it. Wind and cold can make you eat less than you expect, and you’ll need energy for the final walk.
This is also one of the spots where your guide becomes a story-teller, not just a safety manager. In accounts of the tour, guides were praised for sharing lots of local knowledge, from area details to tips about plants and animals. Even if that part isn’t central for you, it adds flavor to a day that otherwise could feel like only “work and views.”
Final 3 km hike to Troll’s Tongue: the goal feels closer, but the effort keeps going
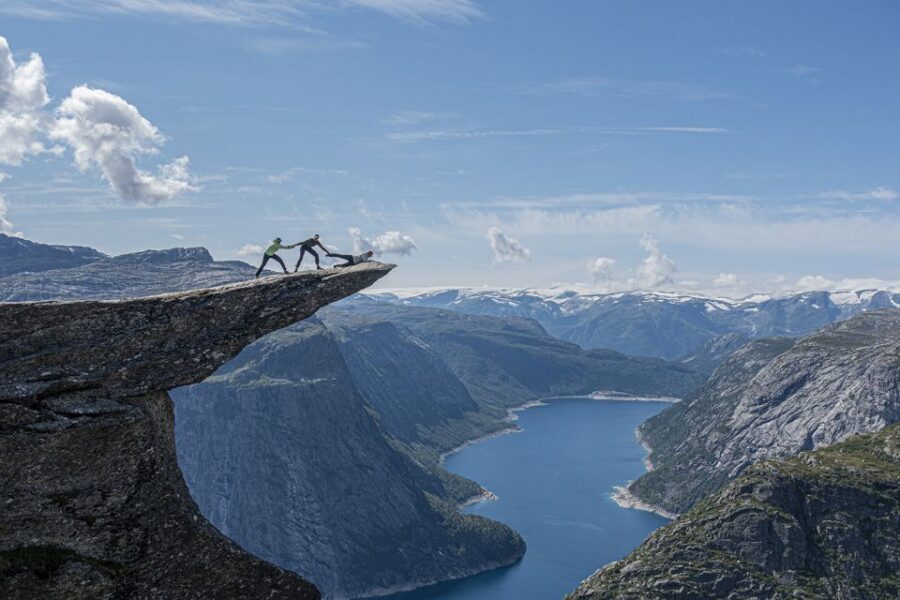
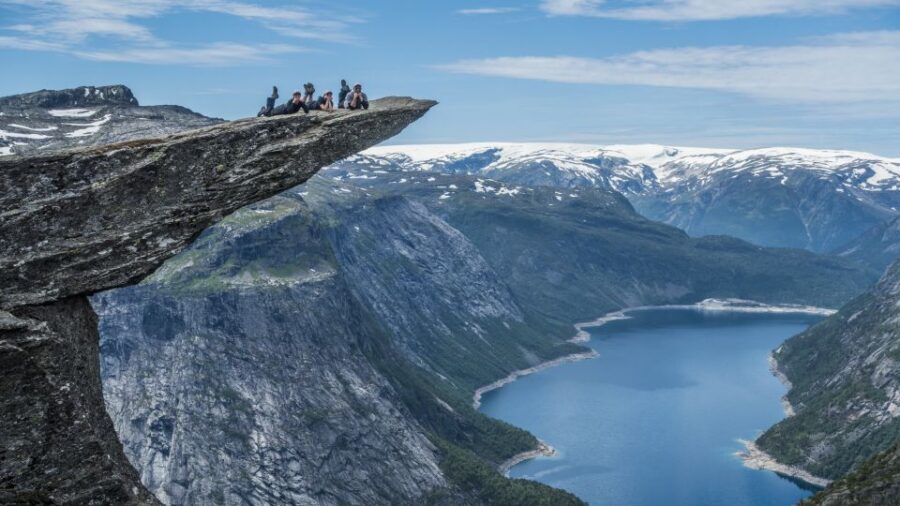
From the summit area, it’s roughly 3 km to Trolltunga, often described as the spectacular Troll’s Tongue rock formation. This part shifts from climbing mechanics to hiking rhythm.
What’s different here is how the day’s earlier effort affects you. Even if the path is straightforward, your legs are already loaded from the via ferrata. So keep your expectations realistic. Walk steadily. Take the breaks your guide offers. This is also the point where the weather can start to influence how the surface feels underfoot.
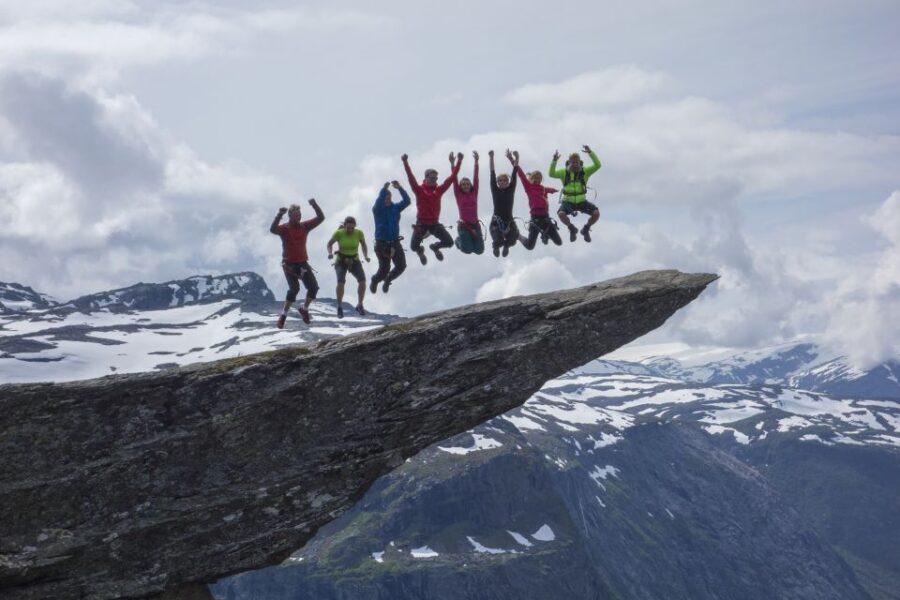
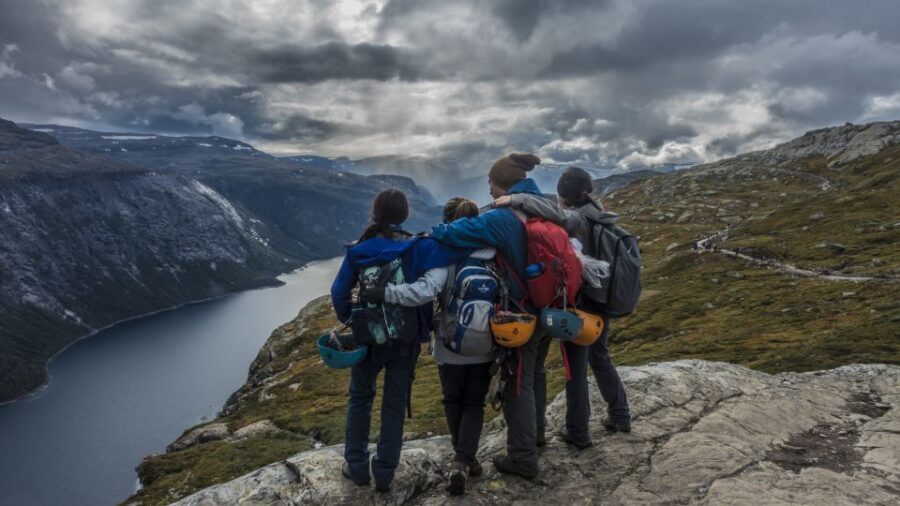
When you finally arrive, you’ll get that classic Trolltunga moment: dramatic drop-offs, plenty of photo energy, and a line of visitors in the distance (though the tour’s plan is designed to avoid the worst congestion). Your guide will help with the “needle picture” styling. You’ll often see helmets and gear turned into part of the photo.
A practical tip: treat the photo moment like a checklist, not a marathon. You want a few good shots, then you want to enjoy the view without rushing. That balance is what makes Trolltunga feel like a memorable experience instead of a quick photo stop.
Photos and timing: how the helmet moment becomes the best souvenir
Your tour includes photos, specifically the Trolltunga “needle picture” from your helmet during the best moment. That matters more than it sounds. When you’re climbing and hiking all day, you don’t want to also fight with a camera timer, shaky hands, and wind.
Guides were frequently praised for taking photos along the way, and that’s the real value here. The guide isn’t just telling you where to stand; they’re helping you capture the moment safely and quickly, then move on. In at least one account, a guide named Toine was highlighted for guiding and capturing incredible photos, and that matches the vibe you should look for.
Also, the tour’s flow aims to help you experience the area without feeling trapped in the peak crowd crush. Even if you still see other hikers, the day is set up so you’re not just sprinting from one bottleneck to the next.
Coming back down: main trail descent or via ferrata finish
After Trolltunga, you’ll hike back along the main trail in a more relaxed pace. This is where you get to process everything you just did. You’ll likely feel pleasantly exhausted, the kind that makes normal walking feel like recovery.
There’s also an option for more adventurous souls: descend via ferrata. If you want the full “steel steps all day” feeling, this can be the way to do it. If you’re already tired, the main trail is often the better choice. Either way, don’t rush. The best descent is the one that keeps your balance steady.
Weather, fitness, and packing: the real Norway lesson here is preparation
Hardangervidda National Park weather can be rough in summer, and that’s not just travel-writer drama. You’ll be on exposed rock and steel, and wind can feel sharper at elevation. So pack for change, not for comfort.
Bring:
- warm layers
- a windbreaker
- sunglasses and a hat
- sunscreen
- a daypack
- food and drinks
If you tend to underestimate cold, bring extra warmth. Even when the sun is out, the combination of height, wind, and shade can make you chilly fast. Also, bring food you actually want to eat when you’re tired.
Fitness-wise, the tour runs about 10 to 12 hours and is not suitable for children under 15. You don’t need to be an athlete, but you do need to be comfortable with a long day on uneven terrain plus climbing exposure. If you’re recovering from injuries or you get breathless easily on steep trails, this might be too much.
Odda value: why $194 feels fair for this much safety and effort
At $194 per person, this isn’t a budget hike. But it’s also not overpriced for what you’re getting—especially if you compare it to trying to do the via ferrata part independently.
You’re paying for:
- a trained guide
- climbing gear and safety setup
- hiking poles provided
- transport to the trail start
- access to the via ferrata and the Sky Ladder section
- a guided plan that ties it all together into one full day
- included photo service for the Trolltunga moment
In plain terms, the cost buys you safety structure and time-saving. You’re not figuring out routes, gear logistics, or how to time the day for Trolltunga’s conditions. You’re also not spending half the day wrestling with equipment. For many people, that’s what makes a difficult day enjoyable instead of stressful.
Should you book this Trolltunga via ferrata and Sky Ladder day?
Book it if you want the Trolltunga experience with real adventure built in: steel steps, exposed views, and a day led by guides who focus on safety and pacing. I’d especially recommend it if you’re comfortable with steep hikes and you don’t want to treat Trolltunga as just a photo stop.
Don’t book it if you:
- dislike heights enough that you might freeze on exposed metal
- aren’t ready for a 10–12 hour day
- don’t handle changing mountain weather well
- need an outing designed for kids under 15
One more smart move: if dome-tent sleeping is part of your version of the experience, confirm exactly how that fits your schedule. If it’s included for you, that see-through ceiling could be the kind of night you remember long after the rock walls fade.
If you’re aiming for a full-on Norway day—mountains, steel, and Trolltunga—this is a strong pick.
FAQ
Where is the meeting point for the tour?
You meet at the local partner’s office (red and blue building) at Skjeggedal 20, 5770 Tyssedal.
How long is the tour and what time does it start?
The duration is about 10 hours. Starting times depend on availability, so you’ll need to check for the time options when you book.
Is lunch included?
No. Lunch and snacks are not included, so you’ll want to bring food and drinks.
Do I need to bring climbing equipment?
No. Climbing equipment is included, along with hiking poles. The tour also provides what you need for the via ferrata and Sky Ladder experience.
How hard is the via ferrata compared with the normal Trolltunga trail?
The via ferrata is described as Level C and said to be not technical if you can manage the normal Trolltunga trail. You’ll be harnessed with a safety wire throughout.
What is the Sky Ladder (Himmelstigen)?
The Sky Ladder is an optional climb section that is about 50 m long. It’s included in the experience, but you can choose to bypass it.
What should I pack for the day?
Bring warm clothing and a windbreaker, plus sunglasses, a hat, sunscreen, a daypack, and food and drinks for the day.
Is the tour suitable for children?
No. It’s not suitable for children under 15.
Is the tour offered in English?
Yes. The live guide speaks English and Norwegian.